T-Mobile BYOD Data and Internet APN settings

T-Mobile BYOD Data and Internet APN settings
T-Mobile BYOD Data and Internet APN settings. When you normally buy a phone direct from T-Mobile, they usually already come with a preloaded set of settings, allowing you to use the phone to browse the internet and send pictures messages instantly, thus enhancing the customer experience.
However, in case you already have an unlocked phone and just bought a T-Mobile Sim card, chances are that you will require to input some Data and APN Settings before you can start browsing. In this post, we will quickly explain you how to do this, so that you can get your Bring Your Own Device – BYOD phone up and running as soon as possible.
The first thing to do, is make sure that your phone is indeed unlocked, this is easy to tell, if you can get a cell phone signal and can make calls, the phone is good to go. Second, you need to have a valid data plan activated on your sim card.
MMS and Data Settings for the T-Mobile BYOD phone
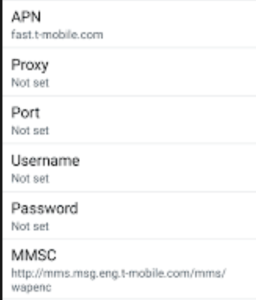
These are the Data and MMS Settings you should configure on your phone:
Name: T-MOBILE
APN: epc.tmobile.com or if you have a LTE enabled phone you should use: fast.tmobile.com instead
Proxy: <Not required>
Port: < Not required >
Username: < Not required >
Password: < Not required >
Server: < Not required >
MMSC: http://mms.msg.eng.t-mobile.com/mms/wapenc
MMS proxy: < Not required >
MMS port: < Not required >
MCC: 310
MNC: 260
Authentication type: < Not required >
APN type: default,supl,mms or you can also you: internet+MMS on Samsung devices
APN Protocol: IPv4/IPv6
Please make sure you do input all the fields as they are listed above, many users experience issues with sending or receiving picture messages because they omit the MMSC settings or have the wrong APN Type, these are relevant fields in order for your phone to send multimedia messages
How to configure APN Settings on the T-Mobile BYOD
If you have an Android phone, these are the steps you should follow:
Go to Settings > Wireless & Networks or Tab on Connections > You should see now Mobile Networks, in some phones you might need to hit More or More Settings to reveal this option. After this you will finally see Access Point Names. Hit the menu key and Create a New APN, you will then need to type in the information provided above
You can also check the instructions on our Youtube Channel: how to Setup APN Settings on Android Device
Should you have any issues, please take a look at our APN Troubleshooting guide for more details
